Some time ago we published a guide on how to set a static IP address in the Windows operating system on your VPS. The reason for publishing this process is the fact that IP addresses are assigned to VPS by DHCP. However, the DHCP protocol is not intended for deployment, and therefore it is suitable to set a static IP address for a virtual server.
Here is a guide on how to configure your IP address on both physical servers and VPS, as well as how to set everything up in popular Linux distributions.
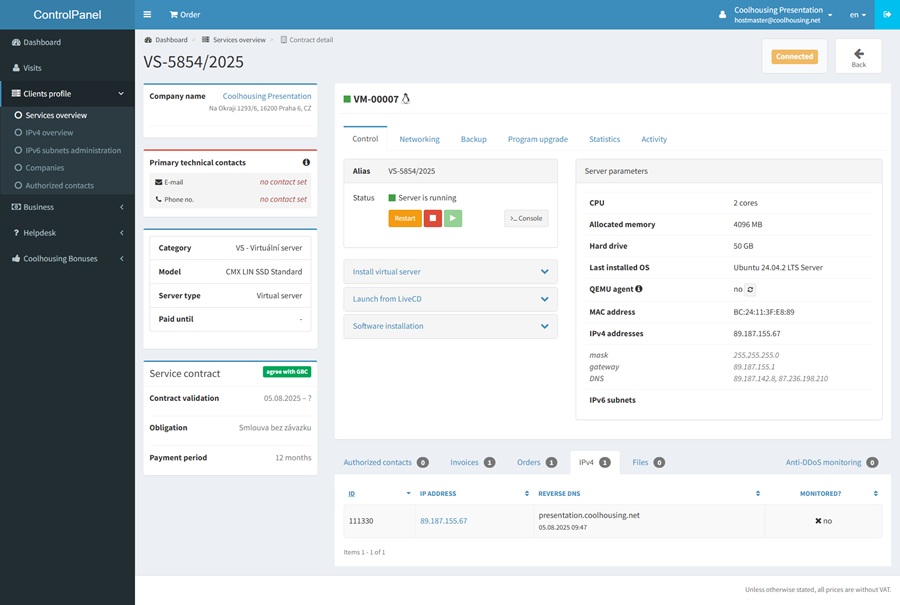
In the details of your virtual server under the Server parameter module you will find the setting for your primary IPv4 and IPv6 address. The primary IP address is the address specified as the first one in the Server parameter module and it is not marked with a star.

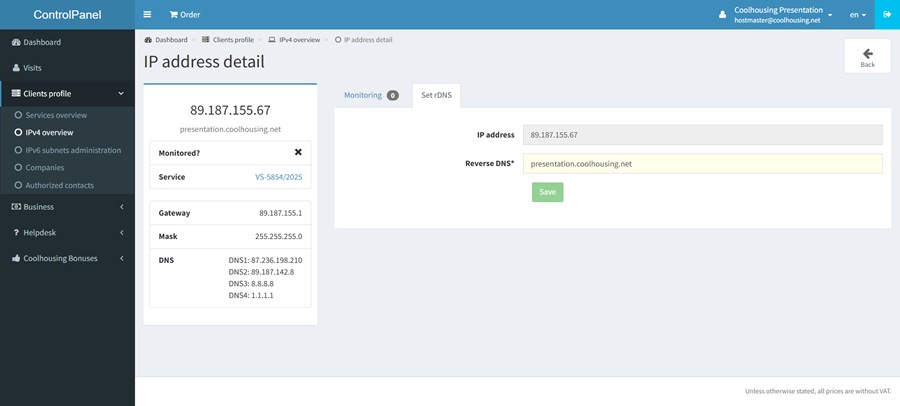
Detailed information about the IPv4 address including options to set reverse DNS record may be found in the lower section of the page under the IPv4 tab after you click on it.

Network Interface Check
If the server does not have any network interface available, please check the network interface by entering the command “ip link show”, which will list all available network interfaces.
You can enable the required network interface using the command “sudo ip link set <interface_name> up”, where <interface_name> corresponds to the name obtained from the previous command.
You can then proceed with the network configuration.
IPv4 Configuration and Network Check
Before you start editing any file it is recommended to back up the edited file!
Do not forget to save each change made to the edited file!
On your server, use the command line to verify your network interface settings, depending on the network manager and Linux distribution you are using. If you are still unsure how to proceed, feel free to contact our technical support, we are happy to help.
The IP addresses and other variables used in the examples are for illustration purposes only. Replace them with the actual IP address, gateway, and DNS servers assigned to your service in the ControlPanel.
To verify your current network adapter settings, please, use the following command:
sudo ip link show
Then check the Netplan configuration with:
sudo cat /etc/netplan/*.yaml
2. Changing the Interface Name with DHCP
When editing the configuration file, first verify the name of your network interface:
sudo nano /etc/netplan/01-netcfg.yaml
Update the configuration for example with:
yaml
network:
  version: 2
  ethernets:
    ens18:
      dhcp4: yes
Apply the changes:
sudo netplan apply
After running sudo netplan apply, it is recommended to restart the system to ensure all changes are properly applied. Interface status changes may not take full effect without a reboot.
Now you can set a static IP address by modifying the network configuration file accordingly:
yaml
network:
  version: 2
  ethernets:
    ens18:
      dhcp4: no
      addresses: [192.168.1.13/24]
      gateway4: 192.168.1.1
      nameservers:
        addresses: [1.1.1.1, 2.2.2.2]
To display the network adapter in the terminal, please, use:
ip link show
Then check your Netplan configuration and open the configuration file in your preferred text editor:
sudo cat /etc/network/interfaces
2. Setting a New Interface with DHCP
Open the configuration file:
sudo nano /etc/network/interfaces
…edit it, for example, as follows:
auto ens18
iface ens18 inet dhcp
Apply the changes with command:
sudo systemctl restart networking
We recommend to reboot the system after making these changes to ensure the interface status is fully updated.
To assign a static IP address, modify the network configuration like this:
auto ens18
iface ens18 inet static
    address 192.168.1.13/24
    gateway 192.168.1.1
    dns-nameservers 1.1.1.1 2.2.2.2
Then restart the server to apply the configuration.
You could verify and manage your network settings using nmtui or by following the steps below:
1. To list all network adapter and connection, please, use command line:
sudo nmcli connection show
2. If the interface name changed, rename the interface:
sudo nmcli connection modify ens3 connection.interface-name ens18
3. To set a static IP address, use the following command:
sudo nmcli connection modify “connection_name” ipv4.method manual ipv4.addresses 192.168.1.13/24 ipv4.gateway 192.168.1.1 ipv4.dns “1.1.1.1,2.2.2.2”
4. To apply your changes, deactivate and reactivate the connection:
sudo nmcli connection down ens18
sudo nmcli connection up ens18
IPv6 address configuration and how to add another IP Addresses
To configure an additional IPv4 address, please, follow the same steps as outlined in the previous guides. Be sure to use the specific IP details assigned to your service in the ControlPanel and modify the virtual network interface ens, which has to be different from your primary IPv4 address.
When adding an IPv6 address the process is similar to IPv4 configuration. However, you will need to change specific parameters such as dhcp6, gateway6, or ipv6 (in RHEL-based systems) during configuration.


